ODL에서 사용하는 Notification의 개념은 RPC와 비슷하다고 생각하면 되는데 차이점이 있다면 Notification은 return값이 없다는것이다.
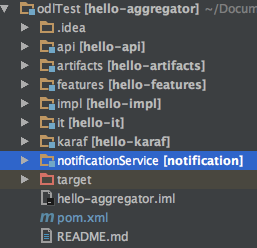
새로운 impl module을 추가하고 폴더명을 notificationService로 변경하고 artifactId 는 notification 로 바꿔준다.
현재 프로젝트 구조는 아래와 같다.

먼저 notificationService 에서 사용될 yang 파일을 만들어 준다.
1
2
3
4
5
6
7
8
9
10
11
12
13
| module notification-manager {
yang-version 1;
namespace "urn:opendaylight:params:xml:ns:yang:notification-manager";
prefix "inventory-manager";
revision "2015-01-05" {
description "Initial revision of ptnTest model";
}
notification noti-updated {
leaf noti-id { type string; }
}
}
|
이어서 NotificationProvider.java 에 notification을 등록해준다.
1
2
3
4
5
6
7
| @Override
public void onSessionInitiated(ProviderContext session) {
LOG.info("NotificationProvider Session Initiated");
NotificationProviderService noti = session.getSALService(NotificationProviderService.class);
noti.registerNotificationListener(new NotificationImpl());
}
|
NotificationImpl.java 를 생성하고 위에서 생성한 yang 파일을 implements 한뒤 onNotiUpdated 메서드를 구현해준다.
1
2
3
4
5
6
7
8
9
| public class NotificationImpl implements NotificationManagerListener {
private static final Logger LOG = LoggerFactory.getLogger(NotificationImpl.class);
@Override
public void onNotiUpdated(NotiUpdated notification) {
LOG.info("Receive Noti : "+notification.getNotiId());
}
}
|
이제 NotificationListener를 수현했으면 호출해서 사용만 하면 된다.
- 아래 예제에서는 hello-world-write RPC가 호출되면 전달된 값을 notificationService 로 넘기도록 하였다.
1
2
3
4
5
6
7
8
9
10
11
12
13
14
15
| public Future<RpcResult<HelloWorldWriteOutput>> helloWorldWrite(HelloWorldWriteInput input){
//Noti 호출부분
NotificationProviderService notiService = session.getSALService(NotificationProviderService.class);
NotiUpdatedBuilder builder = new NotiUpdatedBuilder();
builder.setNotiId(input.getStrin());
notiService.publish(builder.build());
//
//RPC result return
HelloWorldWriteOutputBuilder helloWriteBuilder=new HelloWorldWriteOutputBuilder();
helloWriteBuilder.setStrout("return"+input.getStrin());
return RpcResultBuilder.success(helloWriteBuilder.build()).buildFuture();
}
|
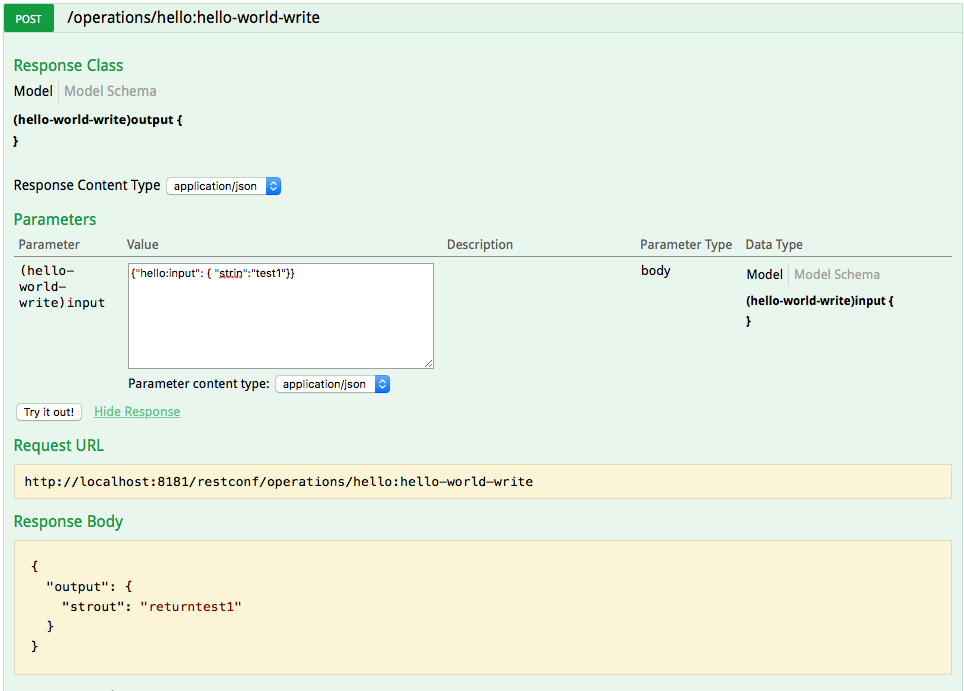
이제 위 예제를 돌려보아 다음과 같은 결과가 표시되면 정상적으로 동작한것이다.
- RPC 호출
- {“hello:input”: { “strin”:”test1”}} 을 post 방식으로 전달해주면 return 으로 다음과 같은 결과를 받는다.
1
2
3
4
5
| {
"output": {
"strout": "returntest1"
}
}
|

- Notification 호출
- hello-world-write RPC를 호출하면 전달받은 strin 값을 notificationService 으로 전달한다.
1
| 2017-03-07 13:18:37,623 | INFO | pool-28-thread-1 | NotificationImpl | 161 -org.opendaylight.hello.notification - 1.0.0.SNAPSHOT | Receive Noti : test1
|

