Yang파일에 RPC 선언 RPC를 구현하기 위해선 yang파일에 rpc를 선언해줘야 한다.
1
2
3
4
5
6
7
8
9
10
11
12
13
14
15
16
17
18
19
20
21
22
23
24
25
26
27
28
29
30
31
32
33
34
35
36
module hello { yang-version 1; namespace "urn:opendaylight:params:xml:ns:yang:hello"; prefix "hello"; revision "2015-01-05" { description "Initial revision of hello model"; } rpc hello-world-write{ input{ leaf strin{ type string; } } output{ leaf strout{ type string; } } } rpc hello-world-read{ input{ leaf strin{ type string; } } output{ leaf strout{ type string; } } } }
위 yang 파일에선 hello-world-write , hello-world-read 두개의 RPC를 선언했다. yang 파일을 만든 후 api module을 bulid 하면 target 밑에 java source code가 생성된다.
xxxProvider.java 파일에 RPC 등록 karaf를 구동하면 Impl module이 자동으로 기동되는데 xxxProvider.java 파일에 있는 onSessionInitiated 메소드에 RPC를 등록해주어 사용이 가능하도록 해준다.
1
2
3
4
5
6
7
private RpcRegistration<HelloService> helloService; @Override public void onSessionInitiated (ProviderContext session) LOG.info("HelloProvider Session Initiated" ); this .helloService=session.addRpcImplementation(HelloService.class,helloWorldImpl); }
위 소스의 설명을 하면
private RpcRegistration helloService; 에서 HelloService 는 위에 생성한 yang 파일의 모듈명이다. 예제에선 hello 라는 이름으로 모듈을 생성했고 RPC로 생성될때는 $module명+Service = HelloService 라고 생성되는것이다.
helloWorldImpl.java 구현 helloWorldImpl.java는 HelloService 를 implements 받아 생성된 메서드를 구현해줘야 한다. 위의 yang 파일에선 hello-world-write , hello-world-read 두가지 RPC를 선언했으므로 두개의 메서드를 implements 받아 구현한다.
1
2
3
4
5
6
7
8
9
10
11
12
13
14
15
16
17
18
19
20
21
22
public Future<RpcResult<HelloWorldWriteOutput>> helloWorldWrite(HelloWorldWriteInput input){ HelloWorldWriteOutputBuilder helloWriteBuilder=new HelloWorldWriteOutputBuilder(); helloWriteBuilder.setStrout("return" +input.getStrin()); return RpcResultBuilder.success(helloWriteBuilder.build()).buildFuture(); } public Future<RpcResult<HelloWorldReadOutput>> helloWorldRead(HelloWorldReadInput input){ HelloWorldReadOutputBuilder helloReadBuilder=new HelloWorldReadOutputBuilder(); try { helloReadBuilder.setStrout("Echo :: " +input.getStrin()); }catch (InterruptedException e){ System.out.println(e.getMessage()); }catch (ExecutionException e){ System.out.println(e.getMessage()); } return RpcResultBuilder.success(helloReadBuilder.build()).buildFuture(); }
내용추가
impl 빌드 할때 Line does not match expected header 에러가 발생하면 impl 의 pom.xml 파일에 아래 내용을 추가해주면 된다.
1 2 3 4 5 6 7 8 <build > <plugin > <artifactId > maven-checkstyle-plugin</artifactId > <configuration > <skip > true</skip > </configuration > </plugin > </build >
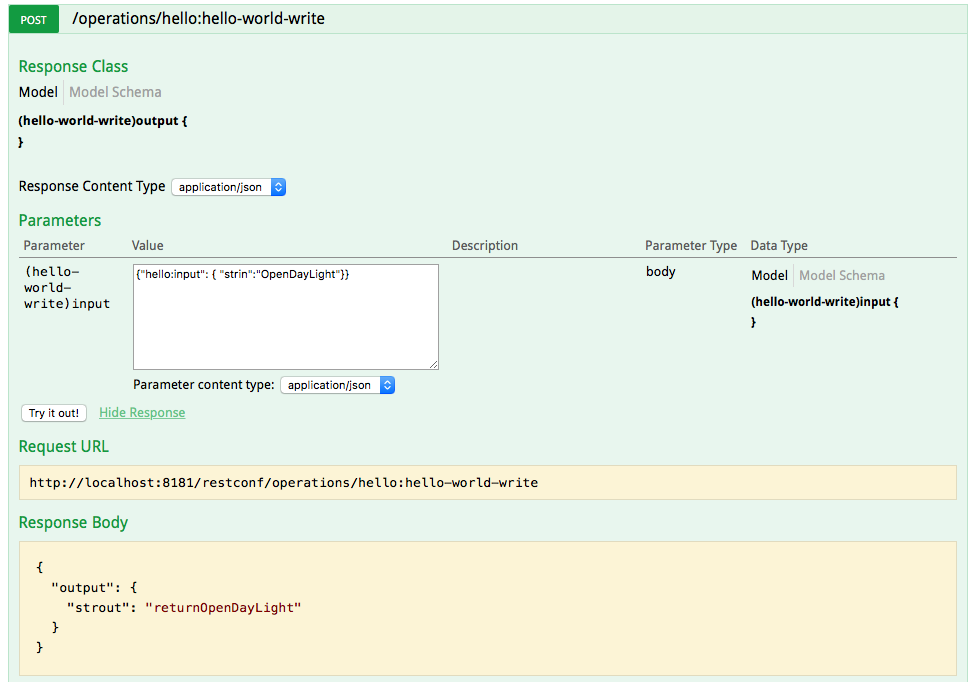
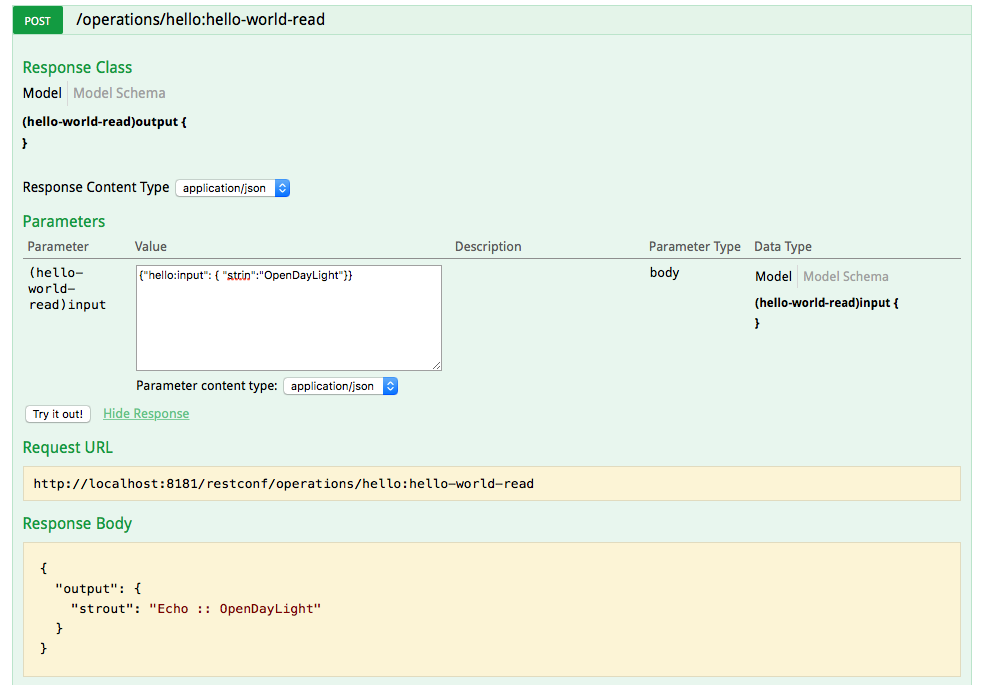
실행 결과
각각을 선택하여 {“hello:input”: { “strin”:”OpenDayLight”}} 이라는 메시지를 전송하면 이에대한 응답이 올것이다.

